


Setting up a projector involves more than just plugging in the device and pointing it at a blank wall. Whether you’re creating a home theater, a conference room presentation space, or a classroom environment, proper projector placement is critical to achieving optimal image quality and an immersive viewing experience. This guide consolidates expert advice from top industry sources to help you master projector placement and create the perfect viewing setup.
Understanding Throw Distance and Its Impact
One of the foundational concepts in projector placement is the throw distance — the distance between the projector lens and the image surface (screen or wall).
-
Long Throw Projectors: Typically installed on ceilings farther from the screen, these projectors can cast very large images and are suited for large rooms.
-
Short Throw Projectors: Positioned closer to the screen (roughly 3 to 8 feet away), these projectors reduce shadows and eye glare and are often installed on walls or ceilings near the screen.
-
Ultra-Short Throw Projectors: Placed extremely close to the screen (0 to 4 feet), often on furniture or mounted just above or below the screen. This placement nearly eliminates shadows and glare, making it ideal for small rooms or apartments.
Throw Distance Formula:
Throw Ratio = Throw Distance / Image Width
You can calculate the ideal projector placement by multiplying the screen width by the projector’s throw ratio, which is usually provided by the manufacturer.
Step-by-Step Guide to Optimal Projector Placement

-
Determine Suitable Distance Using Throw Ratio
Review your projector’s throw ratio from specifications or use online calculators to identify the minimum and maximum distances for placing your device relative to your screen size. For example, a projector with a throw ratio between 1.8:1 and 2.2:1 and an 8-foot-wide screen should be placed between 14.4 and 17.6 feet away. -
Choose Proper Height and Alignment
- The projector lens should ideally align horizontally and vertically with the center of the screen to avoid distorted or keystone images.
- Ceiling mounting is common, especially with standard ceiling heights of 8 to 10 feet. Consider the room’s ceiling height to adjust vertical positioning accordingly.
- Utilize features like lens shift for horizontal or vertical adjustments without needing to reposition the entire projector physically.
-
Ensure a Clear Projection Path
Avoid placing the projector behind obstacles such as ceiling fans, light fixtures, or furniture to prevent image blockage or shadows. -
Consider Ventilation and Stability
Projectors generate heat and require unblocked ventilation to prevent overheating. Use stable mounting hardware or shelves to secure the projector firmly to avoid vibrations or movement that could impact image quality. -
Utilize Keystone Correction and Lens Shift for Off-Center Placements
When center alignment isn’t possible, choose projectors with vertical and horizontal keystone correction to digitally correct trapezoidal distortion. Lens shift is preferable as it physically moves the lens for distortion-free adjustment.
Placement Guidelines for Different Environments
-
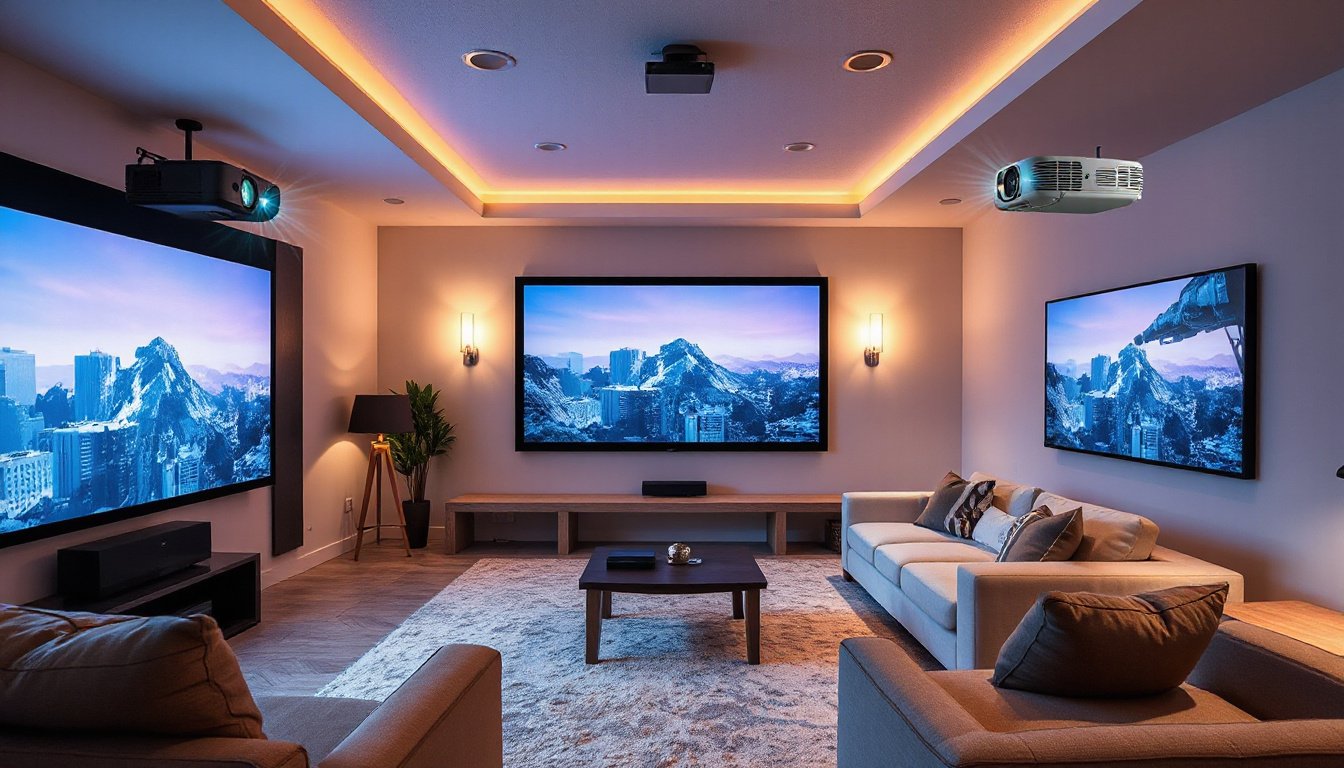
Home Theater:
Position projectors in darker rooms with controlled lighting for the best picture quality. Opt for a short-throw or ultra-short throw projector if space is limited, allowing for large screen sizes without long distances. -
Small Apartments or Limited Spaces:
Ultra-short throw projectors are ideal, requiring less than 4 feet distance to project large images (~100 inches). This setup maximizes screen size while minimizing footprint. -
Classrooms and Offices:
Ceiling-mounted long or short throw projectors positioned at the room’s center provide clear images for multiple viewers. Ensure easy access for maintenance and adjustments.
Screen Size and Viewing Distance Considerations
- A common recommendation is a minimum 100-inch screen for a cinematic experience, but ensure your room can accommodate the throw distance necessary for such a size.
- Viewing distance from seating should be proportional to screen size; a typical average is about 1.5 to 2.5 times the screen width.
Tools to Help You Plan Your Setup
- Throw Distance Calculators by Epson, XTEN-AV, and BenQ can automate the math based on screen dimensions, projector model, and room size.
- AV Design Software, like XTEN-AV’s X-DRAW, allows creating detailed layouts including projector, screen, and speaker placement for a fully integrated AV system.
Conclusion
Mastering projector placement is essential for a seamless, high-quality viewing experience. By understanding key concepts like throw distance, height alignment, ventilation, and image correction technologies, you can effectively set up your projector space—whether in a cozy apartment, a dedicated home theater, or a professional conference room. Use available tools and follow expert guidelines to optimize your projector’s position, achieving bright, clear images and immersive visuals that fully transform your viewing environment.
Remember: Every room and projector is unique, so taking the time to measure, calculate, and plan will save you from common pitfalls and ensure your projector setup is nothing short of perfect.